Launch your project
OpenIndus Modules Overview
Let’s start by understanding how OpenIndus modules work.
Each module contains specific hardware functions. The idea is to gather all the modules you need for your system.
For systems with multiple modules, a rail is required to interconnect them. In such setups, one module operates as the “master”, while the others are designated as “slaves”. This means that programming is only required for the master module; other modules do not need individual programming.
Note
Currently, the “master” module must be either an OI-Core or OI-CoreLite, but we are actively working to enable the use of any module as a “master.”
For single-module setups, no rail is needed, and programming can be done directly on the module itself, which is then referred to as a “standalone” module.
Understanding these distinctions is crucial when starting a new project, as you’ll have the option to choose between “master”, “standalone”, and “slave” configurations.
All our modules use Espressif chips and can be programmed using Arduino. If you’re familiar with Arduino programming, you’ll find it seamless. If not, don’t worry; programming with Arduino is straightforward, and this guide will walk you through it step by step.
The easiest way to set up everything is by using Visual Studio Code with the OpenIndus extension. You’ll find a comprehensive installation guide in the Environment Installation section.
Environment Installation
Visual Studio Code
To begin, install Visual Studio Code. It will be the IDE used to develop with our modules. VSCode is supported on Windows, Linux, and macOS. Please check the installation link.
Install OpenIndus VSCode Extension
Once you have installed VSCode, you can add the OpenIndus extension. This extension will add commands to VSCode, such as creating a new project or retrieving information about connected modules.
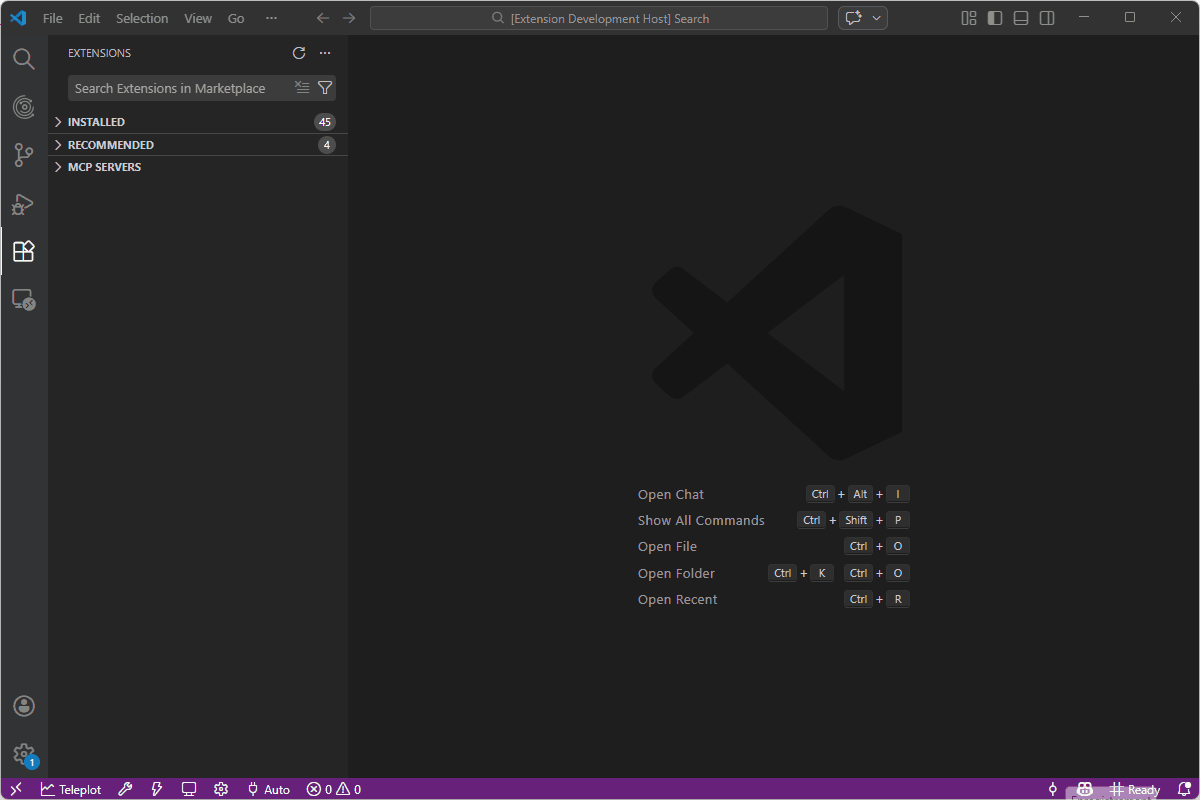
Open the Extension panel
Search for OpenIndus
Click on Install button
Note
The first time, it can take several minutes because VSCode will also install ESP-IDF.
Automatic installation of ESP-IDF
The OpenIndus extension will automatically install ESP-IDF the first time you open the newly added OpenIndus panel. This installation is necessary to use our modules, but it can take some time depending on your internet connection. Don’t worry, you only need to do it once! When ESP-IDF finishes installing, you can start creating your projects and programming your devices.
Warning
Creating a new project during the ESP-IDF installation process may cause issues, as the extension might attempt to install ESP-IDF twice (once per VSCode window). Please wait until the installation is fully completed before starting a new project.
Note
Automatic installation of ESP-IDF and dependencies is supported on Windows, macOS (with Homebrew installed), and Linux distributions using apt (e.g., Ubuntu, Debian). Other Linux distributions are compatible with OpenIndus modules, but automatic installation of dependencies is not supported; manual installation will be required.
If you have any issues during the installation, please refer to the Extension Installation Troubleshooting section at the end of this page.
Begin with your first project
Start a new project
At this point, you have everything you need to begin your first program.
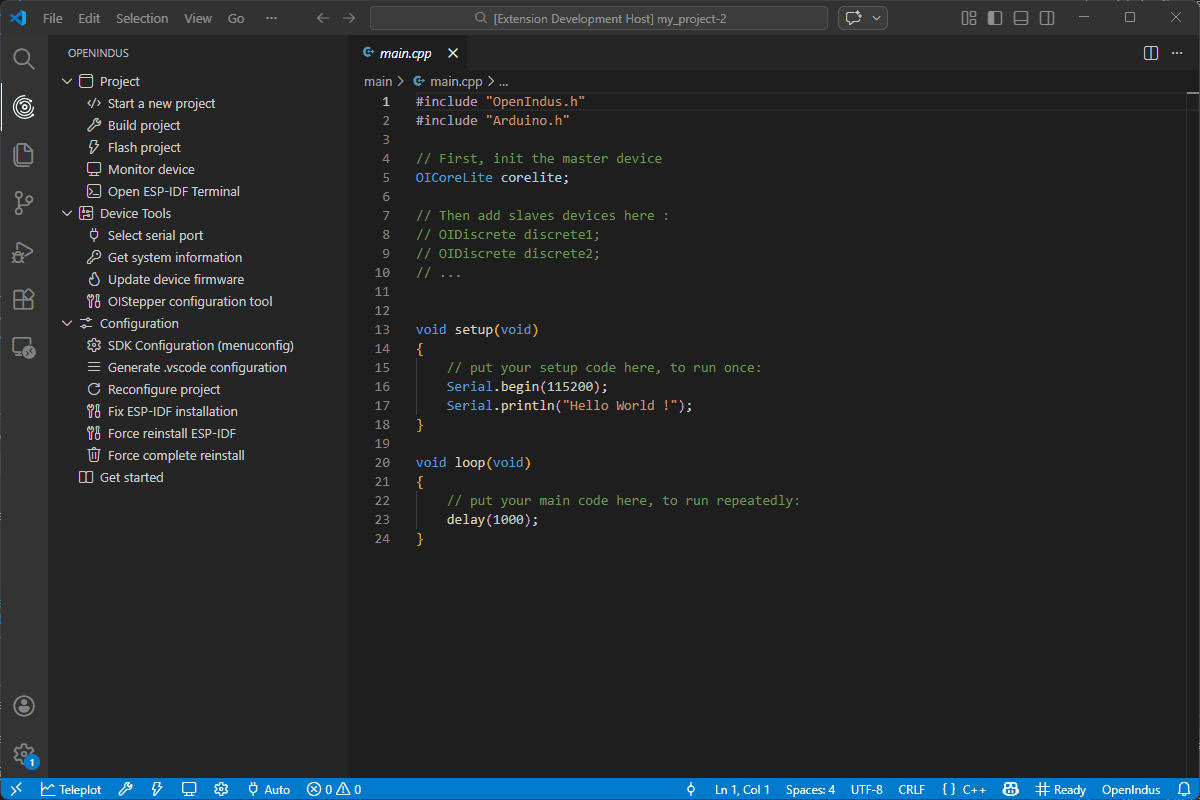
Click on the OpenIndus logo on the left bar
Click on start a new project.
Choose the device you will program. We recommend starting by programming on an OI-Core or an OI-CoreLite.
Choose a root folder for your application.
Choose a name for your application.
Choose the ‘type’ of project. If you have a system with several modules, choose ‘master’ and if you have a system with only one module, choose ‘standalone’.
Choose if you want to use the Arduino Libraries (recommended) or only the ESP-IDF framework (for advanced users).
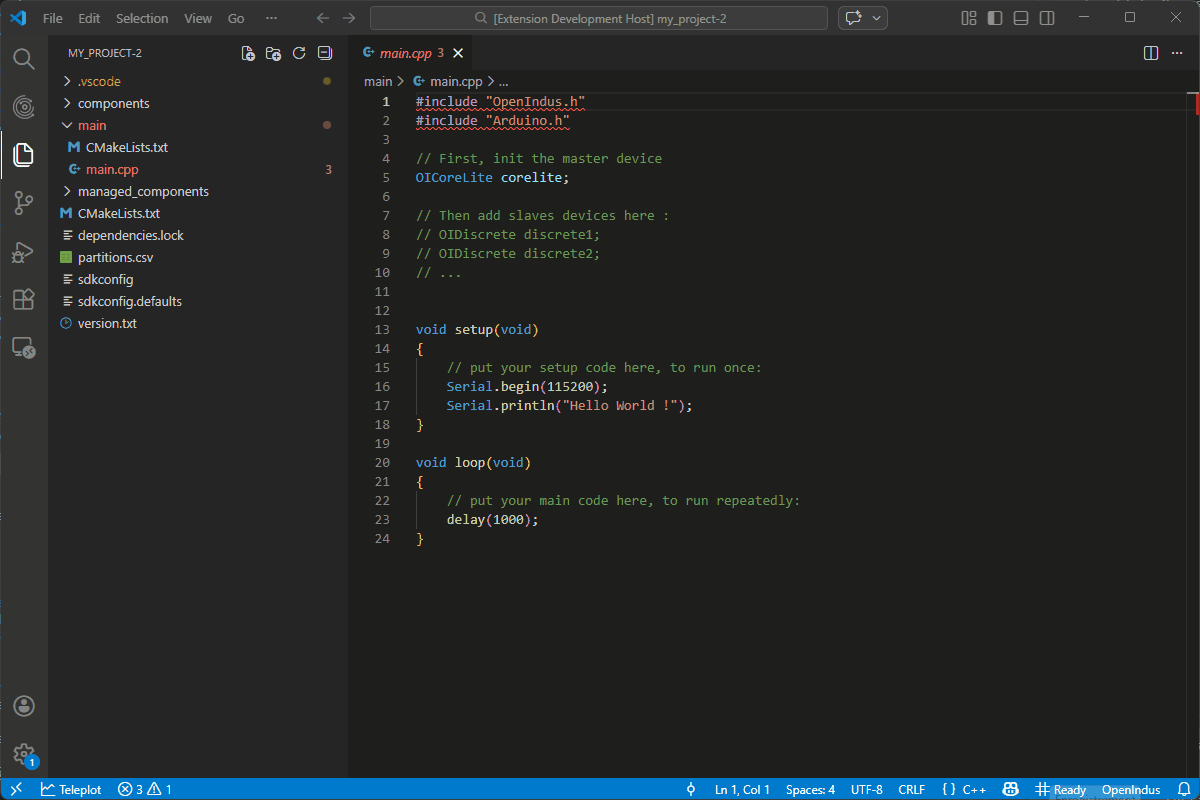
Wait while the project is created. A new folder will open with your new project!
Configure your project
To ensure smooth development in VS Code (including proper code completion, navigation, and error detection), your project needs to be configured.
When you create a new project using the OpenIndus extension, VS Code configuration files are automatically generated, so no manual setup is required for basic functionality.
However, to get the most accurate code completion and avoid false errors in VS Code (like undefined symbols or missing includes), you should run a reconfiguration step:
Click Reconfigure project in the OpenIndus panel, or
If you open a project without a build folder, VS Code will automatically prompt you to reconfigure.
Note
You can always regenerate the VS Code configuration (the .vscode folder) by selecting Generate .vscode configuration in the OpenIndus panel. This is also useful for older projects where linkage was not properly done.
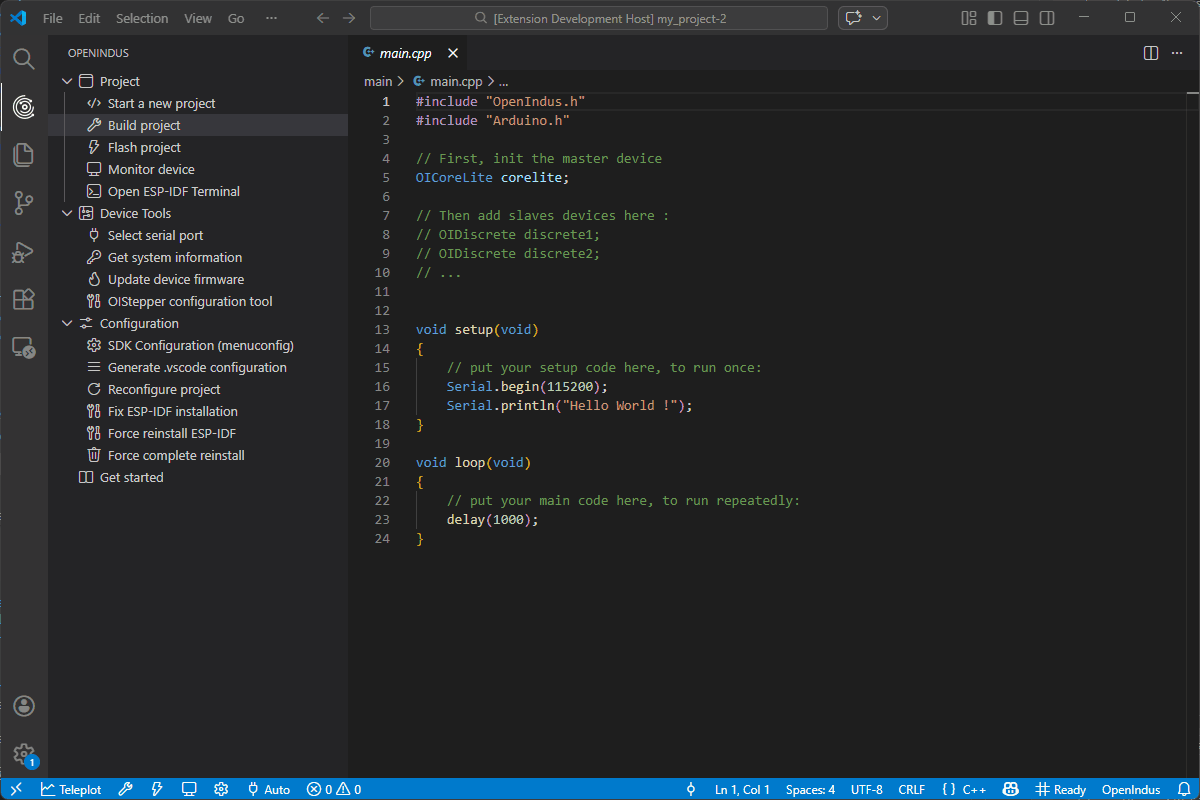
Build your project
The created project prints ‘Hello World!’ to the serial port. You can find the main code in src/main.cpp. If you are familiar with Arduino, you will recognize the ‘setup’ and ‘loop’ functions.
Before uploading this code to the device, you will have to build it. Click on the build button on the bottom bar to build your project.
Note
The first time you build a project, all source files from Espressif library are downloaded and built, don’t worry it is normal behavior. Next builds will be faster.
Upload your project
Plug the device you want to program into your computer with a USB cable. Windows should detect the chip and automatically download the driver. If you cannot see your device in the device manager, please manually download the driver from this link: Silicon Labs driver.
You have to select the correct COM port by clicking the “Select port to use” button in the bottom bar (or let the extension automatically select it). Then you can upload the program to your device with the “Flash Device” button in the bottom bar or in the OpenIndus panel.
Note
You do not need to click on the build button before uploading; ESP-IDF will detect if the project needs to be built again before uploading.
Monitor your project
After a successful upload, click on the “Monitor device” button in the bottom bar (or in the OpenIndus panel) to see the log output from your device.

Start coding
Now you are ready to create your own projects!
Read Digital Input
You can change the default code in the main.cpp file. Below is an example of reading the value of Digital Input 1 and printing the result to the serial monitor every second.
#include "OpenIndus.h"
#include "Arduino.h"

// First, init the master device
OICore core;

void setup(void)
{
    // put your setup code here, to run once:
    Serial.begin(115200);
    Serial.println("Hello World !");
}

void loop(void)
{
    // put your main code here, to run repeatedly:
    Serial.print("Value of Digital Input 1 is ");
    Serial.println(core.digitalRead(DIN_1));
    delay(1000);
}
Add one slave device
We are now going to add an OI-Discrete as a slave device in your code. For that, you need to connect a Core/CoreLite and a Discrete on the same bus. Modify the main.cpp file as follows:
#include "OpenIndus.h"
#include "Arduino.h"

// First, init the master device
OICore core;

// Then add slave device here:
OIDiscrete discrete;

void setup(void)
{
    // put your setup code here, to run once:
    Serial.begin(115200);
    Serial.println("Hello World !");
}

void loop(void)
{
    // put your main code here, to run repeatedly:
    Serial.print("Value of Digital Input 1 of OI-Discrete is ");
    Serial.println(discrete.digitalRead(DIN_1));
    delay(1000);
}
Add several slave devices (with auto ID)
If you want to add several slave devices, you have to add them in the code in the same order as they are mounted on the rail.
For example, if you have the following hardware configuration:
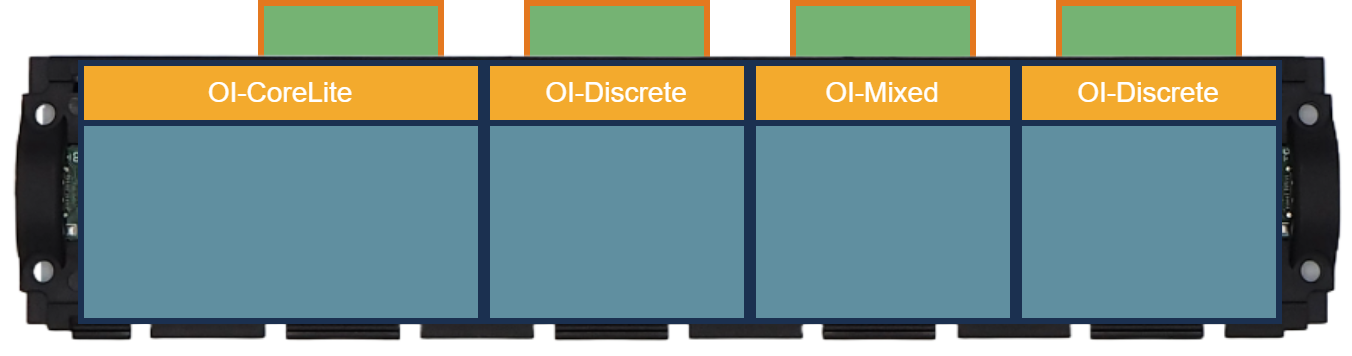
You need to instantiate the boards in the following order:
OIDiscrete discrete1();
OIMixed mixed1();
OIDiscrete discrete2();
Here is a full example code for the configuration above:
#include "OpenIndus.h"
#include "Arduino.h"

// First, init the master device
OICore core;

// Then add slave device here:
OIDiscrete discrete1();
OIMixed mixed1();
OIDiscrete discrete2();

void setup(void)
{
    // put your setup code here, to run once:
    Serial.begin(115200);
    Serial.println("Hello World !");
}

void loop(void)
{
    // put your main code here, to run repeatedly:
    Serial.print("Value of Digital Input 1 of OI-Discrete 1 is ");
    Serial.println(discrete1.digitalRead(DIN_1));
    Serial.print("Value of Digital Input 1 of OI-Discrete 2 is ");
    Serial.println(discrete2.digitalRead(DIN_1));
    Serial.print("Value of Digital Input 1 of OI-Mixed 1 is ");
    Serial.println(mixed1.digitalRead(DIN_1));
    delay(1000);
}
Add several slave devices (with serial number)
An alternative way of adding slave devices is to instantiate them with a serial number.
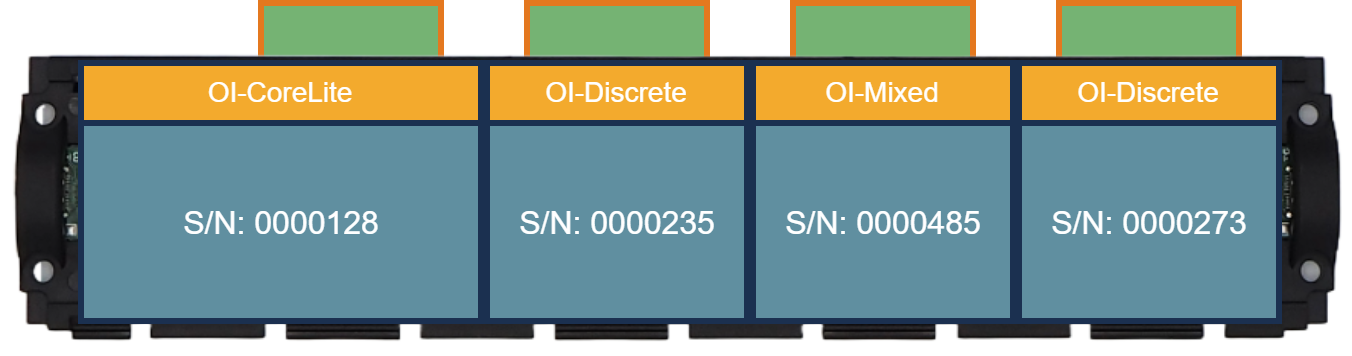
With the configuration above, you can instantiate modules as follows without caring about the order:
OIDiscrete discrete1(0000128);
OIDiscrete discrete2(0000273);
OIMixed mixed1(0000235);
Note
This way of instantiation is not scalable. If you change one module, the serial number will be different and you will have to update your code. The advantage is that you can place your module wherever you want on the rail.
Extension Installation Troubleshooting
If you encounter issues during the installation or usage of the OpenIndus VSCode extension, here are some common problems and their solutions:
- 1. Extension not found in VSCode marketplace
Make sure you are connected to the internet.
Try searching for “OpenIndus” again, or visit the OpenIndus extension page on VSCode Marketplace directly.
If you’re behind a corporate firewall, check with your IT department to ensure access to the VSCode marketplace is allowed.
- 2. Installation stuck or very slow
The first-time installation includes ESP-IDF, which may take several minutes depending on your internet speed.
Check the Output panel in VSCode (View > Output) and select OpenIndus from the dropdown to see detailed installation logs.
If it seems frozen for more than 15 minutes, try restarting VSCode and opening the OpenIndus panel will resume the installation.
- 3. ESP-IDF installation fails
Reset and retry the ESP-IDF installation by clicking on Force complete reinstall in the OpenIndus panel.
Check if you have sufficient disk space for the installation (ESP-IDF can require several GBs).
Open the Terminal panel in VSCode and look for error messages during the installation process. You may have to install dependencies manually.
- 4. Missing commands in Command Palette
After installing the extension, reload VSCode by pressing Ctrl+Shift+P (or Cmd+Shift+P on macOS), typing Developer: Reload Window, and pressing Enter.
- 5. Issues with building
Check the Terminal panel for build error messages.
If you use custom Arduino libraries, be sure to check the Arduino example section.
- 6. Issues with uploading
Ensure your device is properly connected and recognized by your computer.
Check the COM port selection in the OpenIndus panel and make sure it matches the port your device is connected to.
If you are on Windows, ensure you have the correct drivers installed for your device. You can manually download the driver from this link: Silicon Labs driver.
Make sure no other application is using the COM port (e.g., serial monitor, another instance of VSCode, etc.).